说明
本脚适用于大多数云服务器VPS(比如GCP AWS Oracle Azure ...)
GCP谷歌云为我们提供了几种登录云服务器的方式
不过大多数人还是喜欢拿到IP,拿出putty或者xshell进行登录
下面记录下怎么修改让它可以直接putty登录
手动修改
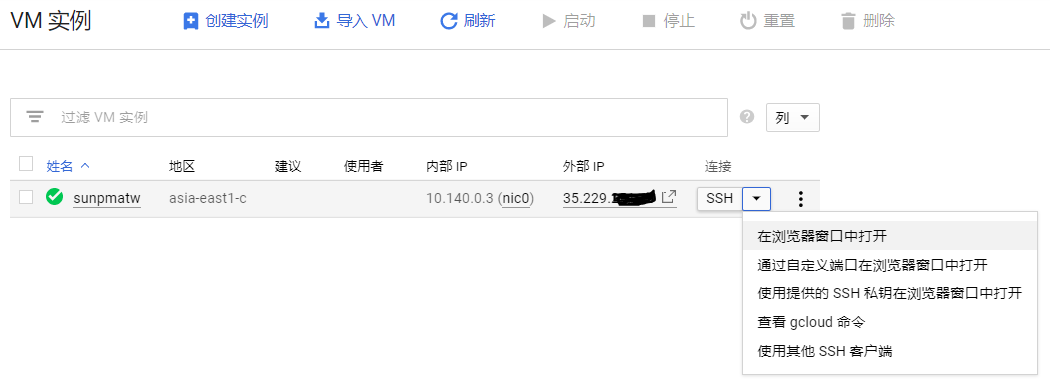
首先点击连接后面的三角形,选择在浏览器中打开
然后一个新的浏览器窗口被开启,系统已自动登录,我们输入命令切换到root用户
sudo -i输入命令编辑ssh配置文件
sudo vi /etc/ssh/sshd_config找到下面两项内容,并修改(no改为yes,如果前面有#注释的去掉#)
PermitRootLogin yes
PasswordAuthentication yes
然后输入命令重启ssh
service sshd restart如果没有设置过root密码就输入下面的命令设置root密码(会提示输入两次)
passwd root一键脚本
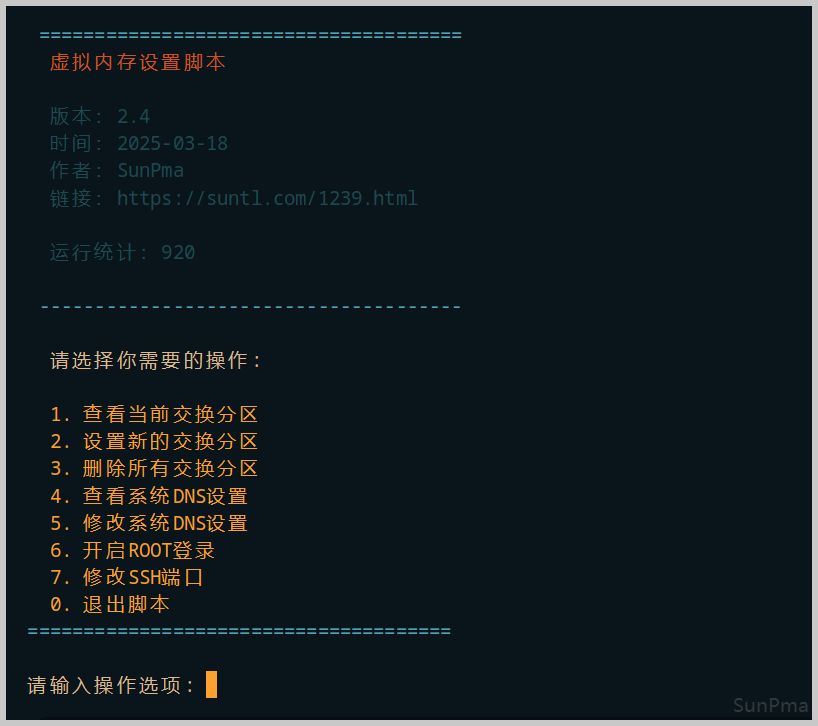
如果上面的手动修改不起作用,可以直接使用下面的一键脚本;
wget -O Swap.sh --no-check-certificate https://suntl.com/other/swap/Swap.sh && bash Swap.sh预览:
预先设定
一些服务商在创建实例时可以直接运行命令行(如GCP Oracle 等...)
在创建实例时添加如下命令就可以直接开启root登录了;
设定:登录用户名为root,登录密码为suntl.com密码可自行修改后再使用;
模糊查找
#!/bin/bash
echo root:suntl.com |sudo chpasswd root
sudo sed -i 's/^#\?PermitRootLogin.*/PermitRootLogin yes/g' /etc/ssh/sshd_config;
sudo sed -i 's/^#\?PasswordAuthentication.*/PasswordAuthentication yes/g' /etc/ssh/sshd_config;
sudo service sshd restart
精准查找
#!/bin/bash
echo root:suntl.com |sudo chpasswd root
sudo sed -i 's/#PermitRootLogin prohibit-password/PermitRootLogin yes/g' /etc/ssh/sshd_config;
sudo sed -i 's/PasswordAuthentication no/PasswordAuthentication yes/g' /etc/ssh/sshd_config;
sudo service sshd restart
某服务商提供的 Ubuntu 20.04/22.04 需要额外添加一项(如GCP Oracle 等...)
#!/bin/bash
echo root:suntl.com |sudo chpasswd root
sudo sed -i 's/^Include \/etc\/ssh\/sshd_config.d\/\*\.conf/# &/' /etc/ssh/sshd_config
sudo sed -i 's/^#\?PermitRootLogin.*/PermitRootLogin yes/g' /etc/ssh/sshd_config;
sudo sed -i 's/^#\?PasswordAuthentication.*/PasswordAuthentication yes/g' /etc/ssh/sshd_config;
sudo service sshd restart
版权声明:本文为原创文章,版权归 suntl.com 所有,转载请注明出处!
本文链接:https://suntl.com/28.html
友情提示:如果博客出现404或链接失效,请留言或者联系博主修复!

脚本下载失败了。已使用这个,麻烦站长吧地址恢复下
重新更新了下脚本,增加了些功能,链接改了:
wget -O Swap.sh --no-check-certificate https://suntl.com/other/swap/Swap.sh && bash Swap.sh
感谢提醒,已修复~~
apt-get -y install wget vim
echo root:54956705|chpasswd
alias sur="su - root"
alias vi="vim"
cp /etc/ssh/sshd_config /etc/ssh/sshd_config_backup
sed -i 's/#PermitRootLogin prohibit-password/PermitRootLogin yes/g' /etc/ssh/sshd_config
sed -i 's/PasswordAuthentication no/PasswordAuthentication yes/g' /etc/ssh/sshd_config
systemctl restart sshd
wget -N --no-check-certificate https://raw.githubusercontent.com/FunctionClub/LocaleCN/master/LocaleCN.sh && bash LocaleCN.sh
wget --no-check-certificate -q -O bbr2.sh "https://github.com/yeyingorg/bbr2.sh/raw/master/bbr2.sh" && chmod +x bbr2.sh && bash bbr2.sh auto
谢谢